277V to 120V Transformer Wiring Diagram | Step-by-Step Guide
Electricity, though invisible, powers our world in diverse ways. It’s common to encounter a robust 277 volts, distinct from the typical household current.
The majority of our everyday gadgets and lights are designed for a gentler 120 volts. This disparity raises the need for an intermediary, a bridge between these two voltage levels.
That’s where transformers come into play. These essential devices adeptly adjust voltages, ensuring our appliances receive just the right amount of power. Dive in with us as we demystify the transition from 277 volts to 120 volts, simplifying the electrical landscape.
Why It Is Necessary to Step Down From 277V to 120 V
In many commercial buildings, the electrical system runs at a higher voltage, typically 277 volts. This setup is often chosen because it’s efficient for certain large-scale applications.
However, our day-to-day devices and lights, commonly found in homes and offices, are tailored for a gentler 120 volts. When these devices are exposed to a higher voltage, there’s a risk they might malfunction or even get damaged due to the intense power.
To bridge this gap and ensure the safety and efficient operation of our appliances, it becomes crucial to step down the voltage from 277 to 120 volts. This adjustment not only safeguards our devices but also optimizes energy consumption, aligning with the needs of both commercial spaces and everyday gadgets.
The Role of Transformers
At their core, transformers change electricity from one voltage to another. They’re used extensively to ensure that electrical equipment operates correctly and safely.
When dealing with a 277V to 120V transformer, the goal is to ‘step down’ or decrease the voltage from the higher 277-volt level to the lower, commonly used 120-volt level, making the power suitable for everyday devices and appliances.
Recognizing Your Transformer
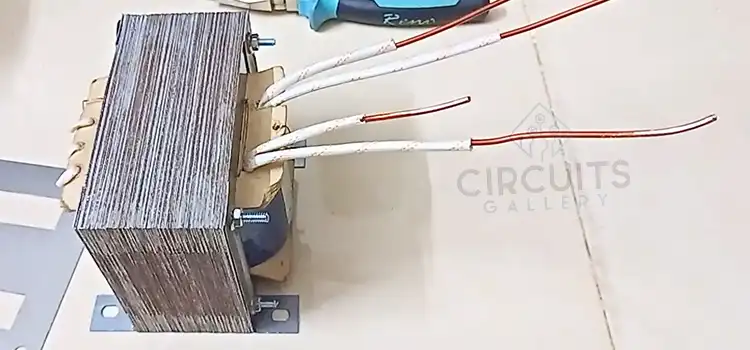
Transformers come with information labels indicating their input and output voltage capacities, among other specifications. For this task, you need a step-down transformer that accepts 277 volts and outputs 120 volts. Ensure you verify these details on the label or in the product specifications before starting the wiring process.
Necessary Tools and Components
Before beginning, gather all necessary tools and components. These typically include the transformer itself, wire strippers, a screwdriver, a multimeter for testing voltage, and protective gear like gloves and safety goggles. Remember, it’s crucial to choose a transformer designed to handle the conversion from 277 volts to 120 volts specifically.
Wiring with a Dimmer or Switch
Looking at the image, you’ll see a transformer connected to a “277V Dimmer or Switch”. This dimmer or switch lets us control the brightness of the lights connected to it. After the electricity passes through this switch, it goes to the transformer.
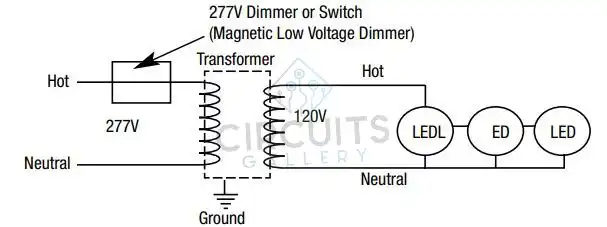
Image 1: Wiring with a Dimmer or Switch
From the transformer, the electricity gets converted down to 120 volts and then goes to the lights, labeled as “LEDL,” “ED,” and “LED”.
Wiring with an Electronic Low Voltage Dimmer
In this image, the setup is slightly different. Here, the transformer first converts the 277 volts down to 120 volts. After that, it passes through a “120V Electronic Low Voltage Dimmer or Switch. This is another type of switch that lets us control the light brightness.

Image 2: Wiring with an Electronic Low Voltage Dimmer
There’s also a note about the “Dimmer Neutral Connection”. Some dimmers have a special neutral wire that should be connected for them to work properly. If you’re using this type of dimmer, make sure to connect this wire as shown.
Starting the Wiring Process
Before you start, ensure you have the right tools. Typically, you’ll need wire connectors, a screwdriver, and safety gear.
Power Off
Always start by turning off the electricity. Safety first!
Connecting High Voltage
Begin with the 277-volt side. Connect the wires as shown in the images, making sure the “Hot” and “Neutral” wires are connected to their respective spots.
Setting Up Low Voltage
After the transformer, connect the 120-volt wires. Again, ensure “Hot” and “Neutral” are connected correctly.
Grounding
The ground is a safety feature. It’s there to protect you and your devices. Make sure to connect it as illustrated.
Checking
Once everything is connected, turn the power back on. Test the lights and switches to ensure everything works correctly.
Frequently Asked Questions
Can I use any transformer to convert from 277 volts to 120 volts?
No, not all transformers are designed for this specific conversion. You should use a transformer explicitly designed for stepping down from 277 volts to 120 volts. Always check the transformer’s label and specifications to ensure it’s the right one for the job.
What should I do if the transformer gets hot during operation?
Transformers can get warm during operation, but if it becomes excessively hot or emits a burning smell, turn off the power immediately and seek professional assistance. Overheating can indicate a problem with the transformer or incorrect wiring.
Can I use a transformer meant for other voltage conversions to step down from 277 volts to 120 volts?
No, you should use a transformer explicitly designed for stepping down from 277 volts to 120 volts. Using the wrong type of transformer can lead to electrical hazards and damage to your equipment.
Conclusion
In conclusion, transforming electricity from 277 volts to 120 volts is feasible with care and adherence to safety measures. Whether opting for a DIY approach or professional assistance, prioritizing safety ensures a successful and functional electrical setup.
Subscribe to our newsletter
& plug into
the world of circuits