How to Bypass the Ambient Light Sensor | A Comprehensive Guide
In the modern computerized landscape, the ambient light sensor (ALS) has risen as a standard feature in numerous electronic gadgets, particularly smartphones, tablets, and laptops. Its primary job is to gauge the environmental light intensity and change the screen brightness to match.
Whereas this feature aims to upgrade user comfort by preserving battery and minimizing eye distress, there are occasions when deactivating or overriding it gets to be essential. This article digs into the reasons behind disabling the ALS and offers an organized tutorial to achieve it.

Why Bypass the Ambient Light Sensor?
1. Individual Preference: Numerous people want hands-on control of their device’s brightness, avoiding automated changes.
2. Fluctuating Brightness: The ALS can sometimes be excessively responsive, leading to unexpected and distracting shifts in screen luminosity.
3. Battery Drain: Opposite to its energy-saving design, nonstop brightness modifications by the ALS might in some cases accelerate battery consumption.
4. Specialized Requirements: Activities like video editing, photography, or graphic design require a steady screen brightness to ensure precise color depiction.
Step by Step Process to Bypass the Ambient Light Sensor (ALS)
Bypassing the ALS will provide you with more control over the brightness of your device’s screen. Based on the equipment being utilized, the bypass strategy varies. Here are specific instructions for well-known devices:
1. Tablets and Smartphones
Here are the instructions for iOS and Android devices:
iOS (iPhone/iPad)
– Open the “Settings” application.
– Choose “Accessibility”
– Choose “Display Accommodations”
– Deactivate “Auto-Brightness.”
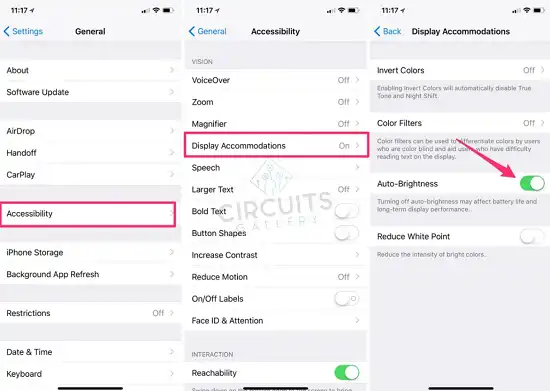
Image 1: iOS
Android
– Select the “Settings” option.
– Depending on your interface, select “Display” or “Display & Sound.”
– Select “Brightness Level”
– Disable “Automatic Brightness” or a comparable setting.
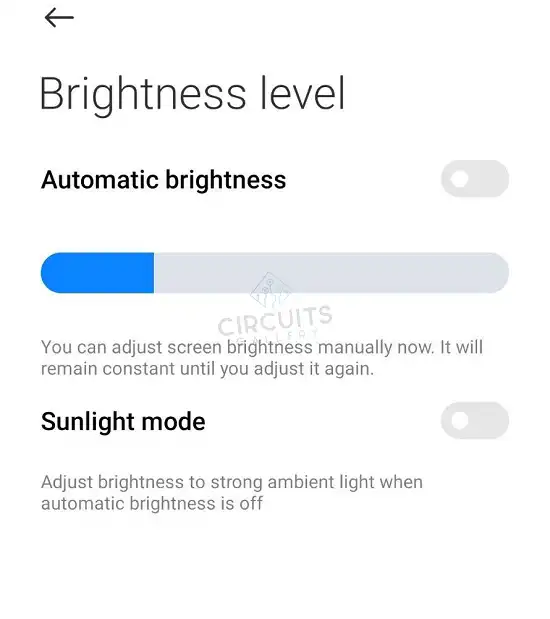
Image 2: Android
2. Laptops and Tablets
Here are the instructions for Windows and Mac devices:
Windows
– Click on the Start button, then “Settings.”
– Navigate to “System,” then “Display.”
– Under “Brightness and color,” turn off “Change brightness automatically when lighting changes.”
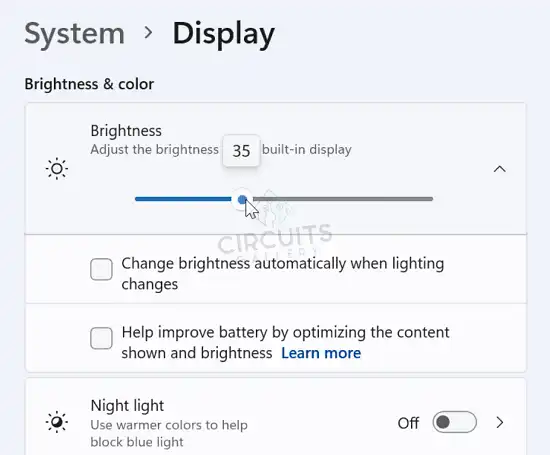
Image 3: Windows
Mac
– Open “System Preferences.”
– Click on “Displays.”
– Deselect “Automatically adjust brightness.”
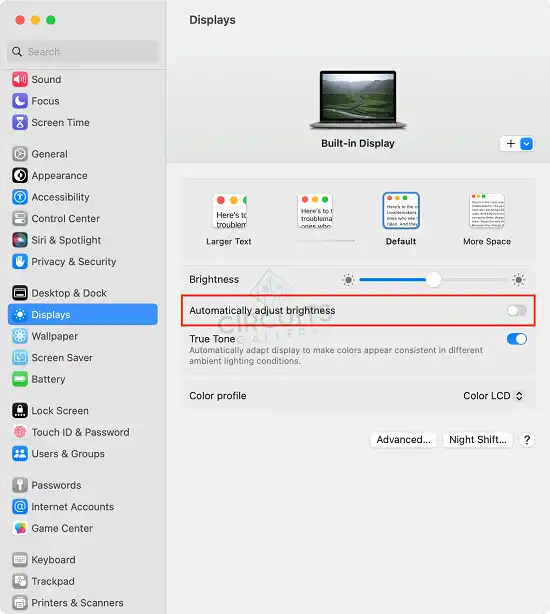
Image 4: Mac
By overriding the ALS, you can set your screen brightness to your liking, ensuring consistent illumination irrespective of environmental light. Whether desiring increased control, mitigating ALS sensitivity, or conserving battery with dimmer settings, these guidelines empower you to manage your device’s luminosity.
Frequently Asked Questions
What are the risks of bypassing an Ambient Light Sensor?
Excessive brightness levels and the possibility of hardware damage during the modification process are risks involved with bypassing an ALS. Bypassing the ALS may also void the warranty or violate the terms of benefit for your device.
Are there software-based methods to control display brightness without bypassing the ALS?
Yes, a number of devices feature settings or control panels that permit you to manually alter the display brightness. Without disabling the ALS, users can manually change the brightness levels. Also, there are applications and tools from third parties that provide users with more control over screen brightness.
Can I re-enable the ALS if I change my mind after bypassing it?
Depending on your device and how the ALS was bypassed, it might be possible to reverse the change and enable the sensor once more. It is recommended that you obtain professional help if you choose to reverse the changes because it can be a challenging and risky process.
Conclusion
The Ambient Light Sensor (ALS) in modern devices optimizes screen brightness based on environmental lighting, enhancing user comfort and conserving battery. However, there are valid reasons for bypassing it, from personal preference to specific professional needs. Understanding ALS and its implications allows users to make informed choices about their device settings.
Subscribe to our newsletter
& plug into
the world of circuits