How to Test Onan Ignition Coil? | Step-by-Step Guidance
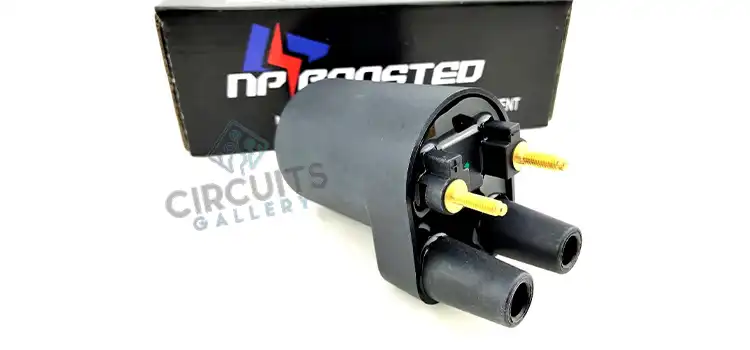
To test your Onan ignition coil, simply disconnect the positive and negative wires from the coil. Now connect a jumper wire from the batt + to the + coil post, and another to a good ground. Tap the ground jumper on the negative coil post to test if the spark plug will spark.
An ignition coil’s purpose is to convert the low current from a car battery into sufficient power to ignite the fuel and start the engine. When an ignition coil fails, it causes a variety of mechanical and performance concerns.
Steps for Testing Onan Ignition Coil
Backyard mechanics’ most popular method involves connecting a spark plug to the engine or chassis and cranking the engine. If there is a spark, the coil is in good working order. The most precise way is to use a multimeter.
To test your Onan ignition coil perform the following steps:
- Remove the plug wires and check for continuity if there is no spark at the spark plugs. No continuity indicates a faulty wire.
- Replace them both.
- Check that the condenser is not grounded. Remove the condenser and check for continuity between the wire’s end and the condenser’s mounting bracket. There should be no continuity.
Steps for Testing a Coil on Onan Motor
Move the test light to the coil’s negative terminal while it is grounded. Start the engine. The test light should alternate between bright and dim pulses. Replace the ignition module if the light does not pulse.
Perform the following steps to test for the spark on the Onan motor:
- Check the battery voltage on each of the red/white wires using a voltmeter while the key and kill switch are turned on.
- The dual output coil must always have both spark plug wires attached to a spark plug. Connect one of the spark plug wires to a spark plug grounded to the engine to test for spark.
How Do You Check an Ignition Coil With a Multimeter
It is possible to have some spark when testing ignition coils; however, the spark may not be adequate to fire the spark plugs under compression circumstances. This is why the multimeter test outperforms the shade-tree method of connecting a spark plug to an engine or chassis.
To check the ignition coil with a multimeter, perform the following steps:
- To test the condition of the primary winding, touch the multimeter terminals to both the positive and negative posts on the coil.
- Compare the readings to the recommended readings in the vehicle’s operations handbook. Any deviation from the recommended reading indicates that the coil has to be replaced.
- When testing the secondary winding, set the multimeter terminals on one of the outer posts and the center post where the coil wire attaches.
- If there is a difference between the reading and the recommended reading in the handbook, the coil should be replaced.
How Do You Manually Test an Ignition Coil?
To manually test an ignition coil, you need a spark tester and you’re good to go. Following are the instructions you’ll need to follow to test your ignition coil manually:
- Connect the tester to the coil.
- Connect the ground wire. Now connect the coil connector.
- Adjust the spark gap to the proper size and begin the engine.
- If there is a spark, it works; if there is no spark, the coil is faulty.
What if My Ignition Coil Has Power but No Spark?
There are several causes of no spark. A new coil pack could be problematic, as could a crank sensor, ignition module, a damaged wire in the primary circuit, or a malfunctioning ECM/PCM. You may need to have a good technician inspect, diagnose, and price the repair.
The primary and secondary wire windings make up an ignition coil. The primary winding delivers an electrical charge to the coil from the vehicle’s electrical system. The secondary winding is responsible for carrying the electrical charge from the coil to the distributor or the spark plug.
How Long Do Ignition Coils Last?
In the United States, federal law requires that the ignition coil and ignition module on new vehicles be warranted for at least two years or 24,000 miles, whichever comes first. The ignition coil’s insulation will deteriorate with time, but many coils are built to last 100,000 miles or more.
It is not possible to fix a defective ignition coil; it must be replaced. In such circumstances, your mechanic may advise you to replace all three rear ignition coils as a preventative measure. When one of the ignition coils breaks, it is also advised that all spark plugs be replaced if they haven’t been changed in a while.
Frequently Asked Questions
What is the function of the ignition coil?
The ignition coil functions as a transformer. The ignition coil converts the electrical energy from the car battery into high voltage, preserves it briefly, and then sends it as a high voltage current pulse to the spark plug through two coils, one inside the other.
Conclusion
Examining ignition coils is critical since a weak electrical charge from the coil can cause an engine to run rough, lack power, or have very bad fuel mileage. A weak coil will frequently pass the shade-tree technique of testing. But it could lack adequate spark output to ignite the fuel mixture properly.
Subscribe to our newsletter
& plug into
the world of circuits