How to Wire a Subpanel to Another Subpanel | A Step-by-Step Guide
Indeed, wiring a subpanel to another subpanel is possible and often a necessity in expanding electrical systems. Expanding your electrical system by adding a subpanel to another subpanel requires precision, caution, and adherence to safety protocols.
We’ll outline the steps and considerations necessary to effectively and safely connect one subpanel to another, ensuring a seamless extension of your electrical setup.
Necessary Tools and Materials
Before you begin, ensure you have the following tools and materials ready:
- Subpanels: Primary and secondary subpanels.
- Circuit Breakers: Appropriately sized for the sub-panel.
- Cables: Copper wiring sized according to electrical load requirements.
- Screwdrivers, Pliers, and Wire Cutters: For installing and securing connections.
- Protective Gear: Safety gloves, goggles, and appropriate attire.
Preliminary Steps
- Plan and Design: Assess the electrical load requirements and plan the configuration of your subpanels. Consult with a certified electrician if necessary.
- Safety First: Turn off the main power supply to avoid electrical accidents.
- Prepare the Work Area: Ensure there’s ample space to work around both subpanels. Keep the area clean and free of any obstructions.
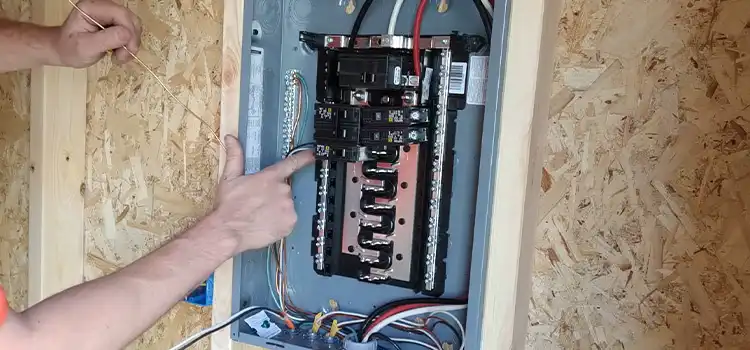
Wiring the Subpanels
The wiring procedure is as follows:
- Establish a Location
Decide where to mount the secondary subpanel about the primary one. Ensure it’s easily accessible and within suitable distance for wiring.
- Connect the Ground Wires
– Locate the ground bus bar in each subpanel.
– Use appropriately sized copper wire to connect the ground bus bars of both subpanels. This creates a solid grounding path.
- Run the Conductors
– Calculate the load requirements to determine the appropriate wire size.
– Use insulated cables to connect the terminals of the primary subpanel to the secondary subpanel. Ensure the cables are secured properly and avoid any kinks or bends that could damage the wires.
- Install Circuit Breakers
– In the primary subpanel, install a dedicated breaker for the secondary subpanel.
– Connect the wiring from the dedicated breaker in the primary subpanel to the appropriate breaker in the secondary subpanel.
- Test Connections
– Double-check all connections to ensure they are properly secured.
– Restore power and test the subpanels to confirm they are functioning correctly.
Final Checks and Safety Measures
Before concluding the wiring process for subpanels, it’s crucial to perform thorough checks and implement safety measures to guarantee the system’s reliability and safety.
- Connection Verification
– Double-Check Connections: Review all wiring connections between the primary and secondary subpanels. Ensure each wire is securely connected without any exposed parts.
– Tighten Fastenings: Verify that screws and fastenings are adequately tightened but not over-torqued to prevent damage.
- Grounding and Earthing
– Inspect Grounding Points: Recheck the grounding connection between the subpanels to confirm a solid and secure grounding path.
– Earthing System Check: Verify that the earth connection for the subpanels is in place and functioning correctly.
- Breaker Configuration
– Label Circuit Breakers: Ensure that all circuit breakers are clearly labeled to indicate their corresponding areas of use. This labeling facilitates easy identification during maintenance or troubleshooting.
– Test Breakers: Test each circuit breaker to ensure they trip appropriately when overloaded, ensuring protection against electrical faults.
- Documentation and Safety
– Document Wiring Configuration: Create a detailed document or diagram outlining the wiring configuration. Include breaker sizes, wire gauges used, and any specific instructions for future reference.
– Safety Signage: Consider placing safety signage near the subpanels to remind individuals of safety protocols and the importance of shutting off power before conducting any work.
- Visual Inspection
– Inspect for Wear or Damage: Visually inspect the wiring, terminals, and connections for signs of wear, fraying, or damage. Address any issues immediately to prevent potential hazards.
– Clear Workspace: Ensure the work area is free from tools, debris, or any items that might obstruct access to the subpanels.
- Functional Testing
– Restore Power and Test: Once all checks are completed, restore power and test the subpanels to confirm proper functionality. Ensure the subpanels are distributing power as intended.
- Regular Maintenance Reminders
– Schedule Inspections: Set a schedule for regular inspections to ensure the subpanels remain in optimal condition. Regular maintenance can prevent potential issues and ensure continued safety.
Frequently Asked Questions
How often should I inspect my subpanel setup?
Regular inspections, at least annually, are recommended to check for loose connections, signs of wear, or any changes in the electrical load. Consider more frequent inspections in high-use environments.
What’s the purpose of connecting two subpanels?
Connecting two subpanels allows for expanded electrical capacity in a building or specific area. It helps distribute power more effectively, accommodating increased electrical loads without overloading the primary panel.
Conclusion
Wiring a subpanel to another subpanel demands precision, adherence to safety standards, and a thorough understanding of electrical systems. By following these steps carefully and exercising caution, you can safely expand your electrical capacity to meet your needs. Remember, safety should always be the priority when working with electricity.
Subscribe to our newsletter
& plug into
the world of circuits