Range Hood Wiring Diagram | Understanding Your Range Hood’s Wiring
A qualified individual or individuals must complete installation work and electrical wiring in accordance with all relevant codes and standards, including fire-rated construction. To complete the proper wiring one must know the electrical requirements, grounding, fuse, and so on.
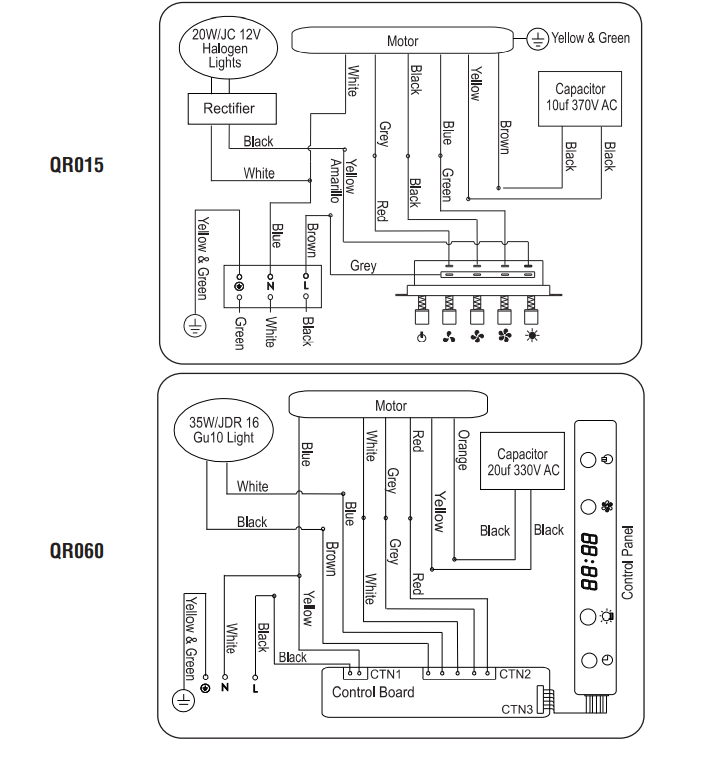
Break Down of Wiring Diagram of Range Hood
In order to ensure that the electrical installation is sufficient and conforms with all local rules and ordinances as well as the National Electrical Code, or CSA requirements, it is the customer’s responsibility to get in touch with a qualified electrical installer. To proceed, store installation guidelines for the use of the electrical inspector.
It is advised that a skilled electrician assess whether the ground path is appropriate if codes permit and a separate ground wire is used. Don’t use this appliance with an extension cord or an adaptor plug. The only copper wire may be used to connect the range hood. All local laws and regulations must be followed regarding wire size.
A flexible, armored, or nonmetallic encased copper wire should be used to connect the range hood directly to the junction or circuit breaker box. So that the appliance can be moved if servicing is ever required, leave some slack in the cable. The junction box and range hood must both have UL-listed or CSA-approved conduit connectors at each end of the power supply wire.
Steps for Wiring a Range Hood
Here are the required steps for wiring a range hood given below.
Step 1: Connect to the Junction Box
Connect the range hood directly to the junction box or circuit breaker box using the power supply wire. Use only copper cables that are flexible, armored, or covered in nonmetallic material. Never use an adapter plug or extension cord.
Step 2: Attach a UL-Listed or CSA-Approved Conduit Connector
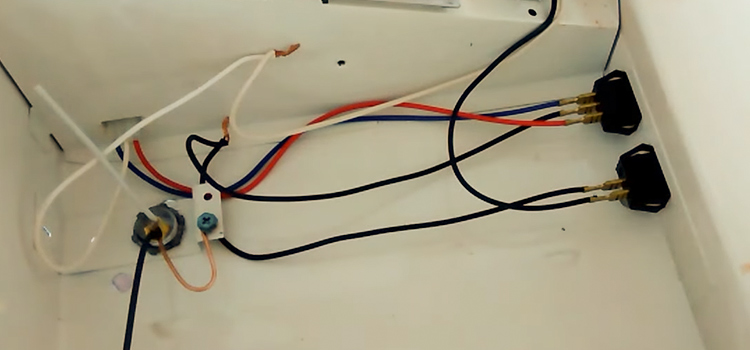
At the junction box and the range hood, attach a UL-listed or CSA-approved conduit connector to either end of the power supply wire. Black to black (live), white to white (neutral), and green/yellow to green/yellow are the three colored wires from the range hood.
They should be connected to the matching wires from the electrical supply (ground). Depending on how you want to install the range hood, use either the top hole or the back hole.
Step 3: Test the Connection
Switch on the power and check if the fan and lights are working properly.
Step 4: Separate the Power Supply Cable
Before continuing with the rest of the installation, separate the power supply cable and wires from the electrical source after testing the electrical connection.
Are Range Hoods Plugged in or Hardwired?
Range hoods come in plug-in and hardwired varieties. If your hood already has a plug, hardwiring is not necessary. If there isn’t a plug, it should be hardwired. Hoods that come with plugs can be hardwired, and hardwired hoods can be made to plug in, depending on the manufacturer’s specifications.
Do Range Hoods Need Their Own Circuit
A range hood typically doesn’t need to be linked to a separate circuit. It can also be hardwired or hooked into a receptacle on a lighting circuit. It can never be connected to a kitchen outlet in a small-appliance branch circuit(SABC). However, it is recommended that range hoods are connected to their own dedicated circuit.
What Gauge Wire Should I Use for a Range Hood
The connected breaker’s amp is the most crucial deciding factor when it comes to the required gauge wire for a range hood to operate properly. To support a range hood, you can normally use wire that is 14/2 or 12/2 gauge.
Use a 14/2-gauge wire if the appliance requires a 15-amp breaker, and a 12/2-gauge wire if a 20-amp breaker is required. If you’re not sure which wire your amp breaker requires, a copper 12/2 is frequently appropriate for everyday use.
Conclusion
It takes more than just fastening a range hood to the wall and putting the wiring into the closest outlet to complete the installation. Certain guidelines must be followed for your home to pass inspection. Your final decision should be based on the electrical requirements of the particular range hood you have.
Subscribe to our newsletter
& plug into
the world of circuits