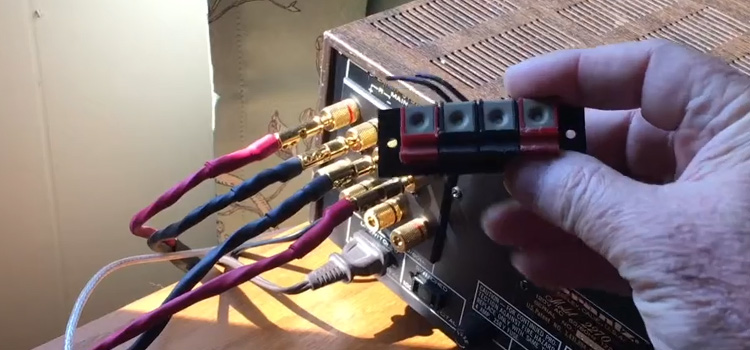
Repair Spring Clip Speaker Terminals | How to Repair Damaged Speaker Spring Clips?
Spring clip speaker terminals can get broken, damaged, or have any other issues. No matter the case it’s always better to replace the problematic one with a new one. In that case, you have to find the right type of clip that goes with your speaker and replace it by following some simple steps.

How to Repair Spring Clip Speaker Terminals?
An electrical connector known as a speaker terminal is frequently used to connect speakers and audio power amplifiers. Each of the two wires on the speaker cable is linked to one of the terminals in the pair, which are utilized in pairs.
How Do You Fix Speaker Connectors?
Fixing a speaker connector is not a big deal. There are two methods of fixing speaker connectors. The first one is, at first, you have to strip off the wire with a plus. Then take the connector and crimp it on the wire with the plus.
The other one is the preferable method. In this method, you have to strip off the wire at first as well. Then put a piece of shrink tube. After that put your connector on and crimp it. Then you have to solder the connection. Remember when you need to solder a connection it’s important to ensure that you heat up the connecting wire first.
Then take the soldering wire and put enough solder on the wire. Let it cool for a second. Once your soldering is done, slide the heat shrink over and shrink it with heat. Finally, hook it up to the speaker.
Do Banana Plugs Work With Spring Clips?
Spring Clip Terminals cannot be used with Standard Banana Plugs. Like conventional speaker wire, Deadbolt Flex Pin Connectors are made to slide into terminals.
How Do You Connect Spring Clip Terminals?
For home theaters, meeting spaces, and other setups with numerous speaker lines, ICC’s innovative audio speaker connector with spring clip is the perfect option. For proper polarity, it is provided in pairs of red and black.
Like spring clips, the terminals also come in a number of different types. Wires are held in place by a spring-loaded clip. To connect spring clip terminals, you have to push the clip down and insert the wire into the hole. Once the clip is released, it will hold the wire in place.
Steps for Replacing Speaker Terminals
Speaker systems often tend to fail in predictable ways. Thus following the right measure of troubleshooting is really important so that it doesn’t get damaged. First, if you want to replace your spring clip, try to find the closest replacement you can get. It may not be exact. But the size should be close to the real one. Here are the steps of troubleshooting given below.
Step 1: Unscrew the Speaker Terminal
At the back of the speaker, you may see four screws at the four corners. Traditional screwdrivers may not be able to unscrew them. Take a long screwdriver to do the job. Take out the aerial socket as well.
Now take the same screwdriver and undo the screws holding the speaker terminal in place. There may be a screw in the middle part of the speaker. Unscrew it as well to completely get into the speaker.
Step 2: Slide Out the Unit
After unscrewing the speaker as well as the terminal, remove the back part by slowly taking it out with your fingers. Now push the whole unit carefully and gently backward. This will slide out the whole unit from the case. Now turn over the unit.
Step 3: Desolder the Connections
Take a sucker and a soldering iron. Desolder the four connections that hold the speaker terminal to the unit. The whole process should be done very carefully so that no wire gets melted.
Step 4: Solder the New One
After desoldering, remove the damaged terminals. Take the new one and carefully slide it in the exact place. Now take the soldering iron and soldering wire. Carefully solder the four connections. After that just reassemble the whole unit in the case.
Conclusion
Spring clip speaker terminals are mostly found on older and entry-level equipment. The usage of these is very easy and helpful. Just like the application, troubleshooting these if damaged is also easy. Hopefully, the steps and tips mentioned in the article will help in repairing and saving the hassle.
Subscribe to our newsletter
& plug into
the world of circuits