Robertshaw Thermostat Wiring Diagram
In the world of heating and cooling systems, the Robertshaw thermostat stands out as a reliable and efficient device. To maximize its functionality, it’s essential to understand the wiring diagram that accompanies this thermostat.
In this article, we will delve into the details of the Robertshaw thermostat wiring diagram, explaining its components and providing a step-by-step guide to help you install and configure your thermostat with confidence.

What is a Robertshaw Thermostat?
Robertshaw thermostats are known for their precision in maintaining indoor temperatures. They come in different models, catering to various heating and cooling systems, such as gas, electric, or heat pump systems. The wiring setup may vary between models, but the fundamental wiring principles remain consistent.
Robertshaw offers a range of thermostat models to suit various HVAC systems. Some of the most common models include:
- 110-732E: A programmable thermostat for residential heating and cooling systems.
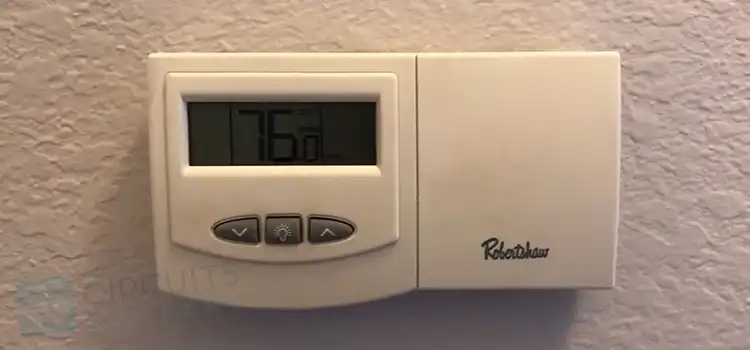
Figure 01: Programmable thermostat.
- ST Series: A line of electric water-heating thermostats.
Figure 02: Line of electric water-heating thermostats.
- EWT2L2: A dual-element thermostat for electric water heaters.
Figure 03: Dual-element thermostat.
- SA Series: A single-element thermostat for electric water heaters.
Components of a Robertshaw Thermostat Wiring Diagram
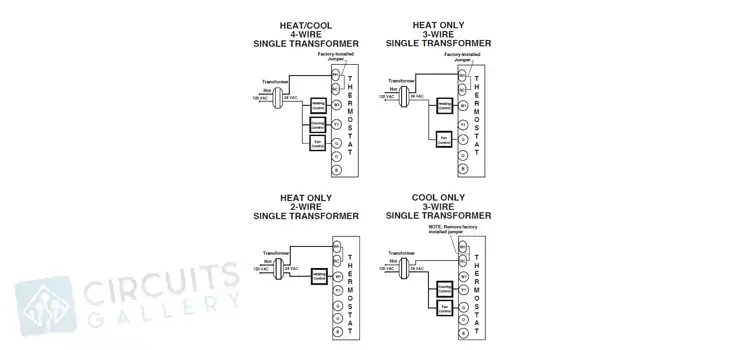
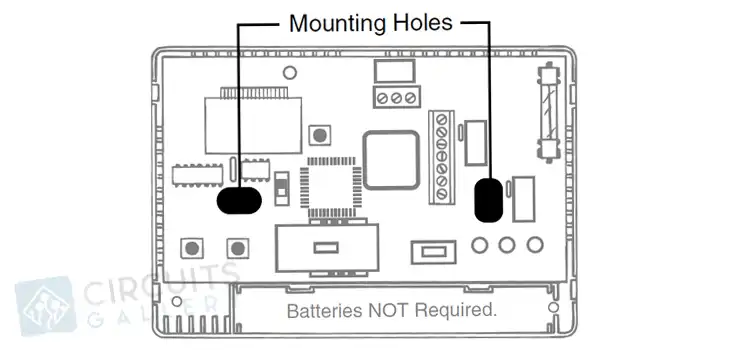
Understanding the wiring diagram involves recognizing the components and their connections:

Figure 04: Robertshaw 8600 Thermostat Wiring Diagram

Figure 05: Robertshaw 9520 Thermostat User Manual
Figure 06: Robertshaw 9520 Thermostat Wiring Diagram
- Thermostat Wires:
R (Red): Usually the power wire from the transformer.
C (Common): Completes the circuit for 24-volt power.
W (White): Controls the heating system.
Y (Yellow): Controls the cooling system.
G (Green): Controls the fan.
- Heating and Cooling Systems:
Furnace: Provides heat for the house.
Air Conditioner/Heat Pump: Provides cooling.
- Transformer: Converts high-voltage power into low-voltage power suitable for the thermostat.
- Fan: Controls the fan in the HVAC system.
Deciphering the Wiring Diagram:
Before attempting to install or service a Robertshaw thermostat, it is essential to thoroughly understand the wiring diagram.
- Identify Wires: Begin by identifying the wires and their corresponding labels (R, C, W, Y, G). Use labels or a multimeter to ensure accuracy.
- Turn off Power: Before working with any wiring, turn off the power supply to your HVAC system to avoid electrical accidents.
- Match Wires: Match the wires from your thermostat to the corresponding terminals on your HVAC system. For instance, the R wire connects to the R terminal on both the thermostat and the HVAC system.
- Compatibility Check: Ensure that the thermostat is compatible with your HVAC system. Some systems might require additional wires or have specific wiring configurations.
- Consult Manual: Refer to the Robertshaw thermostat manual for model-specific wiring instructions. Manufacturers provide detailed diagrams and instructions for installation.
Common Wiring Configurations
It is possible to see multiple wire arrangements. The main ones are described here.
- Single Stage Heating/Cooling: Basic systems with one stage of heating and cooling usually require fewer wires and a simpler wiring setup.
- Heat Pump Systems: These systems might involve additional wiring for auxiliary heat, reversing valves, or other features specific to heat pumps.
- Dual Fuel Systems: For systems utilizing both a heat pump and a gas furnace, special attention is needed to wire the thermostat correctly for seamless operation.
Troubleshooting Tips
When working with electrical equipment, we may find ourselves in situations where the machine needs troubleshooting. Here are some tips that one can follow.
- Check Connections: Loose connections can disrupt the functioning of the thermostat. Ensure all wires are securely connected to their designated terminals.
- Compatibility Issues: If the thermostat isn’t functioning correctly after installation, double-check compatibility with your HVAC system.
- Fuse/Breaker Inspection: In case of power issues, inspect the fuses or circuit breakers related to the HVAC system to ensure they haven’t tripped or blown.
Safety Precautions
When working with electrical equipment, always follow safety precautions:
- Turn off power: Before touching any wires or electrical components, ensure the power to the HVAC system is turned off.
- Use proper tools: Use insulated tools and gloves to protect yourself from electrical shock.
- Seek assistance if unsure: If you are unsure about any aspect of the wiring diagram or installation process, consult a qualified electrician.
Frequently Asked Questions
Can I install a Robertshaw thermostat on my own?
Yes, you can install a Robertshaw thermostat on your own. However, it is important to follow the manufacturer’s instructions and ensure proper wiring connections to avoid any potential issues.
What should I do if the wiring colors of my heating and cooling systems don’t match the standard color coding?
If the wiring colors of your heating and cooling systems don’t match the standard color coding, it is recommended to consult a professional HVAC technician. They can help you identify the correct wires and ensure a proper connection.
Can I program my Robertshaw thermostat to run on a schedule?
Yes, most Robertshaw thermostats come with programmable features that allow you to set schedules for different temperature settings throughout the day. Refer to the user manual for instructions on how to program your specific model.
To Conclude
Understanding the wiring diagram of a Robertshaw thermostat is crucial for a successful installation or replacement. While the process might seem overwhelming, following the diagrams, consulting the manual, and ensuring compatibility can simplify the task. When in doubt, seeking professional assistance ensures a safe and accurate installation, optimizing the performance of your HVAC system.
Subscribe to our newsletter
& plug into
the world of circuits