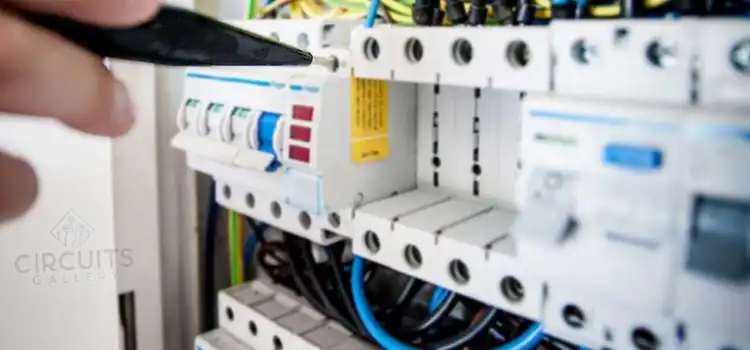
What Size Fuse for 12V LED Lights? A Comprehensive Guide
Selecting the proper fuse size is crucial for the safe and effective operation of any 12V LED lighting system. An incorrectly sized fuse can lead to unnecessary blowouts or, even worse, pose a fire hazard and cause component failure.
This article will give a comprehensive guide on fuse sizing calculations, considerations, and steps to choose the optimal fuse for your LED lights

Mathematical Fuse Sizing Analysis
Calculating the total current that 12V LED lights will draw will help us determine the minimum capacity the fuse and wires must handle.
Step 1: Calculating LED Wattage
First, determine the total wattage of the LED lights in the circuit. Let’s say if the system has 4 bulbs of 10W.
4 x 10W LED lights= 40W total
Refer to the light specifications to find the wattage.
Step 2: Applying Ohm’s Law
Next, we’ll use the basic Ohm’s Law formula. For a 12V system powering 40W of LEDs:
Total Watts = Voltage * Current (Amps)
Current = Watts / Voltage
Or, Current = 40W / 12V
Or, Current = 3.33 A
So, the total current draw is 3.33A in this example.
Step 3: Incorporating a Safety Buffer
It’s also wise to add a 20-30% buffer as a safety factor for unforeseen current spikes. With a 30% buffer, the current for this system would be:
The formula for calculating the total current with the safety buffer is:
Total Current=Initial Current×(1+Safety Buffer Percentage)
Substituting the values from the example:
Total Current=3.33A×(1+0.30)
Total Current=3.33A×1.30=4.33A
So, with a 30% safety buffer, the total expected current for the system is 4.33A.
Step 4: Matching Fuse Size to Wire Gauge
The wiring supplying the LED lights must be adequately sized for the fuse rating and current flow. Higher wire gauge numbers indicate thinner wires, while lower gauge numbers are thicker wires. Thicker wires can safely handle higher amperage.
| Fuse size (Amps) | Current draw (Amps) | Wire size (AWG) |
| 1A | Up to 1A | 18 AWG |
| 2A | 1-2A | 16 AWG |
| 3A | 2-3A | 16 AWG |
| 4A | 3-4A | 14 AWG |
| 5A | 4-5A | 14 AWG |
| 7.5A | 5-7.5A | 12 AWG |
| 10A | 7.5-10A | 12 AWG |
| 15A | 10-15A | 10 AWG |
| 20A | 15-20A | 10 AWG |
| 1A | Up to 1A | 18 AWG |
For the 4.33A load above, a 14 AWG wire paired with a 5A fuse would be a compatible pairing.
Step 5: Estimating Voltage Drop
Voltage drop formula:
Vdrop = I x Rwire
To find resistance Rwire:
Rwire= (ρ x L) / A
= (1.68 x 10-8 x 10) / 2.08 x 10-6
= 0.081Ω
Where,
ρ = resistivity of copper (1.68 x 10^-8 Ωm)
L = length of wire in meters (10m)
A = Cross-sectional area of wire (14 AWG = 2.08mm^2)
Now the voltage drops due to the wire,
Vdrop = I x Rwire
= 4.33A x 0.081Ω
= 0.35V
The 0.35V drop is acceptable, less than 3% of the 12V supply.
Point of Consideration while Installing Fuse
While calculating fuse size consider these points:
- Pick a fuse rating slightly above the expected total current draw. For the example with a 4.33A draw, a 5A fuse would provide a good margin of safety.
- The fuse shouldn’t be drastically over or underrated for the load. Too low will cause unnecessary blowouts. Too high provides inadequate protection
- For automotive applications, mini-blade fuses or ATO fuses are commonly used. Slow-blow fuses are ideal for LED lighting.
- Install the fuse in line on the positive wire leading to the 12V LED lights. This will protect the entire circuit.
Safety Tips to Keep in Mind
When dealing with electrical systems, safety should always come first:
- Use caution and disconnect the power before wiring
- Double-check fuse rating against measured load
- Ensure polarity is correct when connecting lights
- Avoid overloading circuits with too many lights
- Inspect wires and fuses periodically for issues
With proper fusing and wiring, LED lights can illuminate safely.
Frequently Asked Questions and Answers (FAQs)
1. What if I Have a Mix of 12V Led Lights and Other Lights?
Answer: Calculate the total wattage of all the lights together and follow the same process to determine the overall fuse rating needed for the combined circuit.
2. Do I Need a Fuse for a Small, Single 12V LED?
Answer: Yes, it’s advisable to always fuse any LED circuit, even low-power single lights. The fuse protects in case of faults.
3. Can I Use a Higher Amperage Fuse Than Required?
Answer: It’s not advisable, as the circuit won’t be properly protected. At most, go one size above the calculated requirement, but avoid significantly overrating fuses.
To conclude
By following the guidelines here, you too can now easily select the ideal fuse for your 12V LED lighting needs. From calculating wattage and current to choosing fuse types and ratings, apply these steps to any LED lighting project.
Properly fused circuits give peace of mind that your dazzling LED installations will be safe, reliable, and protected. So, plug in with confidence, and let your lighting shine bright with the perfect fuse in place.
Subscribe to our newsletter
& plug into
the world of circuits